


WinTree can be used on more than one computer and we refer to this as a server installation. One important aspect of a server installation is that the version must always be installed on the server/main computer that hosts your database server. If you have any doubts about which device you should use, then make enquiries with your hardware supplier or TSD first.
If you are using WinTree® linked with a Webshop, we would recommend reading the ‘WinTree and Webshops’ description before starting the download.
As soon as TSD has a new version of WinTree available, each company with a WinTree update contract will receive an e-mail from TSD. This e-mail will include a download link.

Clicking this link will download a small download program which can then be used to download the entire new version. Because the e-mail is received on a computer, you will have to download the program and save it on the server. It will then be possible to execute this program from the server and thereby perform the actual version installation.
Click the link to open the standard Internet browser. Depending on the browser, the following steps will have to be taken. Once the download program has been downloaded and saved, it will be possible to execute the program on the server in order to initiate the Setup wizard. Read the description for each browser below and then continue with the Setup wizard description.
 Internet Explorer *)
Click the black arrow on the right next to [Save] and select the ‘Save as’ option. A Windows Explorer screen will then be opened. Select a location in the Network which can be accessed from the WinTree server. The most logical location is the W drive. This location must always be accessible from the server on which WinTree® has to be installed. Save the tsd-DLM.exe file at the chosen location without changing its name.
Do not do anything with the saved file for the time being. The version installation must now be initiated on the server. Read how to do this in the description in the chapter Setup wizard on this page.
*) The description for downloading and saving with Microsoft Internet Explorer is based on Internet Explorer version 11. The procedure may be slightly different for newer or older versions of Internet Explorer. You should consult the corresponding manuals available on the Internet.
Click the download link in the e-mail and Mozilla Firefox will open. Firefox will always try to save the download file.
Click [Save file] to actually save the file on the computer's hard drive. Click [Cancel] to cancel the file download. If the file is saved, this will be to the standard download folder as determined in the Firefox options. Usually this is the Windows user's Downloads folder. No notification will be given once the download has finished. The tsd-DLM.exe file will now have been saved to the standard Firefox download folder. The tsd-DLM.exe file must now be moved to a location which can be accessed by the server. Open the download folder using Windows Explorer and move the file to a new location. The most logical location is the W drive. This location must always be accessible from the server on which WinTree® has to be installed. Save the tsd-DLM.exe file at the chosen location without changing its name.
Instead of moving the file via Windows Explorer, you can also click the blue arrow in the right top corner in Firefox.

In the pop-up that opens, click  next to the tsd-DLM.exe description. The Firefox download folder will be opened in Windows Explorer. Now move the tsd-DLM.exe file to the location on the server.
Do not do anything with the saved file for the time being. The version installation must now be initiated on the server. Read how to do this in the description in the Setup wizard chapter.
*) The description for downloading and saving using Mozilla Firefox is based on Firefox version 37. The procedure may be slightly different for newer or older versions of Firefox. You should consult the corresponding manuals available on the Internet.
Click the download link in the e-mail and Google Chrome will open. Chrome will always save the download file. When the download has finished, the file will be shown in the bottom left corner.

Click the black arrow shown next to this tsd-DLM.exe file. Select the ‘Display in folder’ option. The Chrome download folder will be opened in Windows Explorer. Now move the tsd-DLM.exe file to the location on the WinTree® server. The most logical location is the W drive. This location must always be accessible from the server on which WinTree® has to be installed. Save the tsd-DLM.exe file at the chosen location without changing its name.
Do not do anything with the saved file for the time being. The version installation must now be initiated on the server. Read how to do this in the description in the Setup wizard section.
*) The description for downloading and saving using Google Chrome is based on the Chrome version 42. The procedure may be slightly different for newer or older versions of Chrome. You should consult the corresponding manuals available on the Internet.
 Setupwizard
 |
The version must actually be installed on the server on which the WinTree® database server is also installed. The installation must be performed by a Windows user with installation rights. |
|
During installation all users must have closed all WinTree® programs. This includes computers used in a warehouse, scanners for incoming and outgoing goods, Cash&Carry and stock changes and computers with a scanner (for stickers on demand).
During the entire installation users must not use any WinTree® programs. |
Open Windows Explorer on the server. Look for the saved tsd-DLM.exe file. Double-click the file. A security scan will be carried out. Because an .exe file is going to be opened, you may receive notifications from an anti-virus program. Read these notifications carefully and make the correct choices. This .exe file can be trusted. Consult the manual of the anti-virus program or contact the supplier of the software if the program continues to block the .exe file.
Windows may show the following notification.


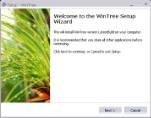
Click [Yes]. The installation program will be opened.
The first screen in the Wizard being used to perform the Setup asks you to select a language.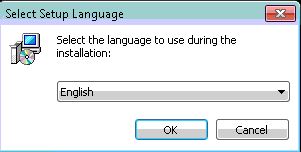
Select the desired language for the set-up from the drop-down list. Click [OK].
After a while, the following screen will be displayed in the wizard.

| The displayed version Latestbuild while be a number which will be different per version. |
Click [Next >]
Click on [Install].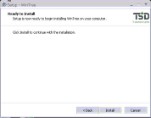
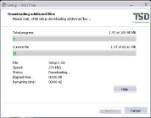
All the necessary files will now be retrieved from a server at TSD. It may take some time to download the files. This depends very much on the speed of the Internet connection being used.
The Internet connection may experience problems during downloading. If the Internet is much too slow or temporarily unavailable, the download will stop. A notification to this effect will be displayed.
Close the notification by clicking [OK]. Then click [Retry]. The download will continue from where it left off. In the event of an unstable or extremely slow connection, it may be necessary to initiate the download several times via [Retry]. Click [Cancel] to close Setup entirely. The whole procedure can then be restarted later by double clicking the tsd-DLM.exe file. If the Internet connection is too slow, you should try again later.
When all files have been downloaded, the following setup wizard screen will open.
Click [Next >].
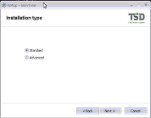
Leave the Standard option selected in the screen that has opened. Only use the Advanced option after consulting TSD.
Click [Next >].
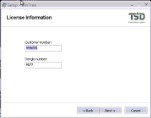
The following screen will display the correct customer and dongle number. This information is retrieved from the WinTree® user's licensing details. If one of these numbers is empty, the correct number must be entered. These details are issued to the user by TSD. Click [Cancel] if these numbers are unknown. Setup will be closed and you should then contact TSD. After TSD has issued the correct details, you can simply click the download link again to restart the process from the beginning.
|
The numbers displayed in the illustration are test numbers. These cannot be used in a real installation. |
Click [Next >].
By default, a shortcut is placed on the desktop of each program for which a licence is available. If you wish, you can deselect certain programs. No shortcut will then be placed on the desktop. The programs can always be started via Windows -> programs –> WinTree Software.
Click [Next >].
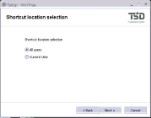
By default, the shortcuts set in the previous step are available to all Windows users. You should only select the Current user option if the shortcuts are only supposed to be available on the desktop of the Windows user who is registered to install that version. This can be a handy option if, for example, the computer is used for non-business purposes and these other users have their own Windows login details.
Click [Next >].
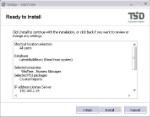
The next screen displays all the previous settings in an overview. You should check the settings. Use [< Previous] to go back several steps in the wizard in order to adjust any settings.
Click [Install] to start installing the new version on the computer.
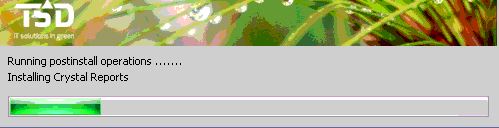
After that, a number of necessary files will be downloaded.
|
Do not use the server during installation. |
The [Hide] button does not hide the wizard, but only the details on the screen.
Click [Details] to display the details again. Via the green bar you can follow the process of the installation being carried out.
Once the version has been completely installed, the final screen of the wizard will be displayed.
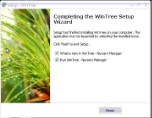
In this screen there will be two selection boxes which perform an action if you click [Complete].
| What's new in WinTree | This opens the general What is New page on the manuals website. Select the correct year on the page and read which changes are available in the new version. The What is New page can always be opened later as well using the WinTree menu Help -> WinTree Help. |
| Start WinTree | This starts up WinTree. A conversion will be immediately carried out. Read the Conversion description to find out more about carrying out conversions. |
Conversion
After a new version has been installed, you will have to convert your databases to the new version. During a conversion, your database is made compatible with the new version. The changes required have to do with the structure of the file and mutual connections. The conversion will never change company specific data stored in the database.
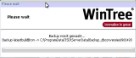
Each database, including history databases, will have to be converted. Open WinTree on the server, the conversion take place automatically when the database opens for the first time after the installation. For extra safety a back-up of the open database is automatically generated just before conversion.
The conversion then starts automatically.
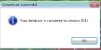
A notification to this effect will be given once the conversion has finished. Depending on the size of the database, this can vary from between 5 to 60 minutes.
You can close this notification by clicking [OK]. WinTree will open and the latest functionalities made available (see also the What is New document for a detailed description of the latest new features).
You will need to open all other databases one by one in order to convert these to the new version.
|
During the conversion, users are not allowed to work in WinTree. |
Installation on workstations
If you have a number of workstations (multi-user), you will have to carry out a client installation on each one. The installation can only be carried out by a user who has administrator authorities. All users must have closed all programs before the installation can be started.

Open Windows Explorer at the workstation and read the description of the W drive. This includes the name of the WinTree server. You will find the server name, which is Spar in the above example, in brackets.
Press the key combination <<Windows flag >> + << r>>. The Execution screen is opened.
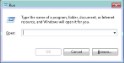
Type the following in the text field: \\servername\wintreeapps\client and click [OK].
The words [servername] must be replaced by the correct server name, which may be a number. Windows Explorer is opened in the correct folder. In this folder you will find a setup.exe. Double-click this file and complete the wizard without making any changes. At the end of the wizard a notification is given that the installation has been completed. The user can now start working with the new version of WinTree.
Webshop-connection
If you work with WinTree module 128, in combination with an active Webshop 2.0, you will need to contact TSD before downloading. We can help you determine how the version should be installed. You may have to make changes in the webshop in order for the link to function properly after installation.
If you initiate the Setup anyway, you will see a warning notification on the screen.
Only click [Yes] after consulting with us at TSD. Click [No] to close the wizard. The version will not be installed and you will be able to continue working with the previous version of WinTree.